Accessibility
Providing equitable access to education for all students
Building your course with attention to accessibility first is important for designing learning experiences where all students can be successful. Accessibility is part of the Universal Design for Learning approach for supporting students with diverse needs. Collaborating with Disability Services can help address specific student accommodations. Key accessibility course design practices include making content readable to screen readers, captioning videos, and adding alternative text and descriptions for images. For insights on accessibility, explore our latest articles on accessibility.
Accessibility helps everyone
Issues of accessibility can be approached from several different directions. Traditionally, the process of making course materials accessible was reactive, with requests being met as they were made. There are some problems with this. It puts the instructor in a position of having to respond, sometimes last-minute, to a request for accommodation. It also places a burden of advocacy on students with disabilities. Not every student with a disability will voice that disability or advocate for their needs.
Providing accessible materials benefits all learners, even those without disabilities. By providing multiple means of access, such as captions, searchable PDFs, and modifiable text size and color, course materials can be improved and broadened for the benefit of all.
How do I make my course accessible?
Review these best practices from the University of Washington’s Center for Universal Design in Education, “20 Tips for Teaching an Accessible Online Course.” These tips are particularly beneficial for students who are neurodiverse (e.g., those on the autism spectrum or who have learning disabilities). Consult Equal Access: Universal Design of Instruction for more guidance.
- Use clear, consistent layouts, navigation, and organization schemes to present content. Keep paragraphs short and avoid flashing content.
- Use descriptive wording for hyperlink text (e.g., “DO-IT website” rather than “click here”).
- Use a text-based format and structure headings, lists, and tables using style and formatting features within your Learning Management System (LMS) and content creation software, such as Microsoft Office or Google Drive; use built-in page layouts where applicable.
- Avoid creating PDF documents. Post most instructor-created content within LMS content pages (i.e., in HTML) and, if a PDF is desired, link to it only as a secondary source of the information.
- Provide concise text descriptions of content presented within images (text descriptions web resource).
- Use large, bold, sans-serif fonts on uncluttered pages with plain backgrounds.
- Use color combinations that are high contrast and can be distinguished by those who are colorblind (color contrast web resource). Do not use color alone to convey meaning.
- Caption videos and transcribe audio content.
- Don’t overburden students with learning to operate a large number of technology products unless they are related to the topic of the course; use asynchronous tools; make sure IT used requires the use of the keyboard alone and otherwise employs accessible design practices.
Eleven tips for inclusive pedagogy follow; many are particularly beneficial for students who are neurodiverse (e.g., those on the autism spectrum or who have learning disabilities). Consult Equal Access: Universal Design of Instruction for more guidance.
- Recommend videos and written materials to students where they can gain technical skills needed for course participation.
- Provide multiple ways for students to learn (e.g., use a combination of text, video, audio, and/or image; speak aloud all content presented on slides in synchronous presentations and then record them for later viewing).
- Provide multiple ways to communicate and collaborate that are accessible to individuals with a variety of disabilities.
- Provide multiple ways for students to demonstrate what they have learned (e.g., different types of test items, portfolios, presentations, single-topic discussions).
- Address a wide range of language skills as you write content (e.g., use plain English, spell out acronyms, define terms, avoid or define jargon).
- Make instructions and expectations clear for activities, projects, discussions and readings.
- Make examples and assignments relevant to learners with a wide variety of interests and backgrounds.
- Offer outlines and other scaffolding tools and share tips that might help students learn.
- Provide adequate opportunities to practice.
- Allow adequate time for activities, projects, and tests (e.g., give details of all project assignments at the beginning of the course).
- Provide feedback on project parts and offer corrective opportunities.
For more information, read an in-depth tutorial on implementing these tips or watch a video by the author, Sheryl Burgstahler.
Who Can Help? With What?
Disability Services
- Working with a student with a documented disability and request for accommodation letter
Nanook Navigator
- Concerns about a student that may or may not be related to disability
Center for Teaching and Learning
Consult a Designer for help with:
- Proactive efforts to improve overall accessibility in a course
- Implementing Universal Design for Learning strategies
- Captioning
UAF Office of Rights, Compliance and Accountability (ORCA)
- Suspected ADA/Title IX discrimination concerns
- Student accommodations for pregnancy/childbirth
University of Alaska Human Resources
- Americans with Disabilities Act (ADA) workplace accommodations for UA employees (including student employees)
Tools for Accessibility Check and Remediation
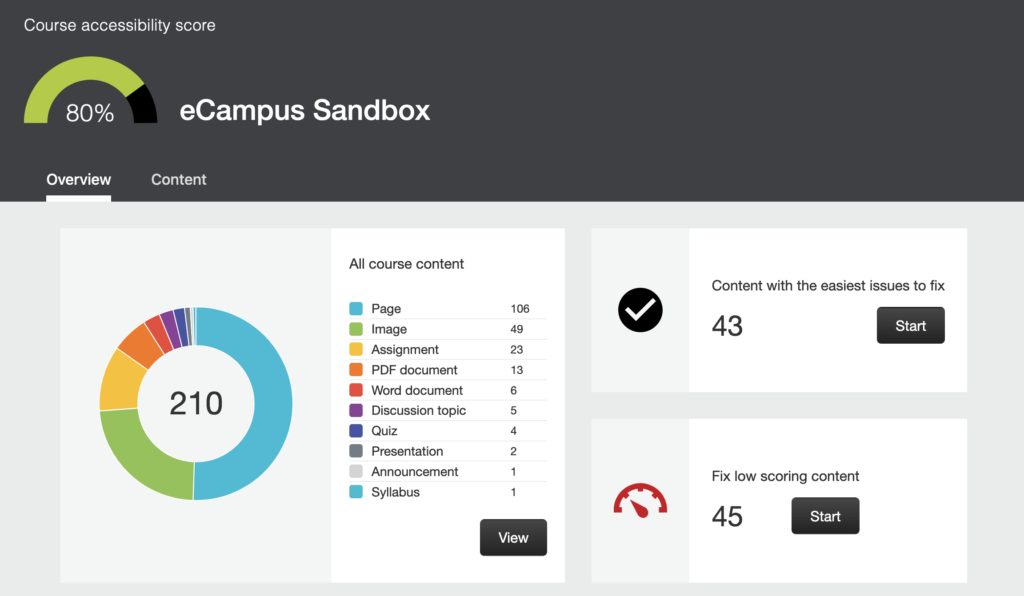
Making sure your course materials are accessible is a multi-step process but there are several tools available to you that you can employ to help you check for problem areas and some of these tools will assist you with remediation when it finds issues.
What are my responsibilities as an instructor?
Legal Considerations
The Americans with Disabilities Act of 1990 (ADA) and Section 508 of the Rehabilitation Act of 1974 are the two most important laws governing the accessibility of educational materials. In April 2024, Title II of the ADA was published with specific provisions for specific requirements about how to ensure that web content and mobile applications are accessible to people with disabilities.
What you need to know
- There is now an April 2026 deadline for web accessibility compliance – aka. the language is transitioning from “should” to “must.”
- These requirements have potential federal funding ramifications for institutions.
- These laws include behind-the-password material, aka. instructional content in Canvas courses and employee software, like AirTable.
- It includes contracted software.
- There is an exemption for archived content.
Additional information is available on ADA.gov
Our Latest Articles on Accessibility
-
Options for captioning course content

Auto-generated captions use a speech-to-text engine to transcribe audio. They have greatly improved over the past few years and are usually 90-95% accurate given clear audio quality, a Standard American English accent, and one speaker speaking at a time. However, even 90% accuracy means 1 out of every 10 words could be incorrect. With any…
-
How accessibility happens at UAF

Learn how disability accommodations work at UAF in a new series hosted by UAF Disability Services, the UA Human Resources ADA office and UAF CTL.
-
Accessibility at UAF: Understanding our accommodations processes

Spring Break Series: March 8th-11th,1:00-2:00pm “UA is an AA/EO employer and educational institution and prohibits illegal discrimination against any individual: www.alaska.edu/nondiscrimination.” You have almost certainly seen this tagline – it’s at the bottom of every university website and publication. But what does it mean?How does nondiscrimination actually work? This series will dive into those questions…
-
Three ways to make your course more accessible

Everyone’s pinched for time and we need real solutions that are quick to implement with regard to accessibility. This tip provides a look at three areas you can improve in your course using simple ideas that are easy to execute.
-
Course Spotlight – BIOL 103
https://media.uaf.edu/media/t/0_29lfjmeq Edited Recording from June 12, 2020 As the instructor for a non-major GER science course, Anja Kade has a lot of students that come with apprehensions about doing well in a lab course, especially a distance lab course. Her friendly tone shines through in her thorough directions and excellent organizational structure. Students do better…
-
Roundup of relevant Teaching Tips during coronavirus pandemic

As you begin teaching via distance, these tips from the CTL archives can help you modify your course without losing quality.
-
Open resources for accessibility

Accessibility is a topic appearing in mainstream conversation with increasing frequency. When it comes to making course materials inclusive and accessible, there are a variety of open tools available.
-
Autocaptions are new in Kaltura
Saccharomyces cerevisiae. Ethical ramifications. IRB application. Supercontinent Pangaea. Sit in a few classes at UAF and these are terms you may hear. These are also terms that have been accurately transcribed by the new auto-captioning feature in Kaltura, UA’s customizable video platform, on real videos created by UAF instructors. As of October 9th, all new…
-
Accessibility round-up for next semester
Come join us for a round-up of CTL’s resources on accessibility and learn how to assess the accessibility of your course by considering three major categories.

