WeVideo Power Tips: Snapping-to
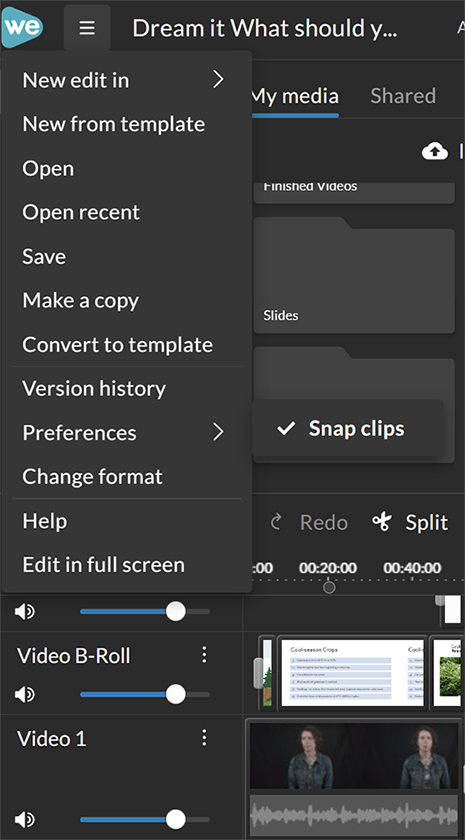
Turning the snap-to feature on.
The snap-to feature is used to allow the user to automatically join clips to other clips so there are no gaps or accidental overlaps with any of the clips you are working with on the timeline. You’ll want this feature to be “ON“. It helps to give you assurance that clips are joined with no unintended gaps.
So, when using Wevideo, we will want to double check first that WeVideo’s snap-to feature is turned on. At the top left, under the “three bars menu” one will see “Preferences” -> “Snap clips”. You can also type “N” on your keyboard as a shortcut. Why N? Well, “S” is already taken by another function, splice, which is the same as adding a cut to your clip. So the next letter in snap is N. Therefore, the shortcut key for turning on the snap-to function is N.
Of note, snapping the play-head to any comment / marker will work even if the “Snap clips” is not checked which is nice — But, you will want to make sure that the Snap-to feature is on for clips to snap-to while editing.

Snapping-to.
There are two ways to snap-to an exact spot that you marked. One, just double click on the open circle made by placing a comment marker. Two, when you click on a circle that indicates a marker, notice the less-than and greater-than signs (they are meant to resemble arrows) on either side of a number like 10/21. Clicking those “arrows” allows you to jump back or ahead one marker at a time. You can close out of the dialogue box or leave a comment on the marker you snap-to.


